


Practicing for the Aspic Invitational
What horrors await?


Susie Hamilton’s 5th annual Aspic Invitational is this week. It’s a mid- to late- 20th century costume party slash gelatin showcase that Susie started hosting in 2019. As a retro expert in media production design, a newly elected city councilwoman, a bravely intrepid burlesque dancer, and the biggest aspic fanatic on the internet with an ornament to prove it, she is uniquely suited for this endeavor. I covered it a bit for TODAY, after I made the Chicken Noodle Soup Salad pictured above for the 2022 Invitational.
I regret to inform you that it is indeed condensed chicken noodle mixed with lemon Jell-O, mayo, and extra canned chicken, and sort of iced with more lemon gelatin and condensed tomato. It was an unmitigated ugh incarnate.
Last year, though, I won with this lemon, Thai basil, lavender goat cheese, pear, fig and almond tower!
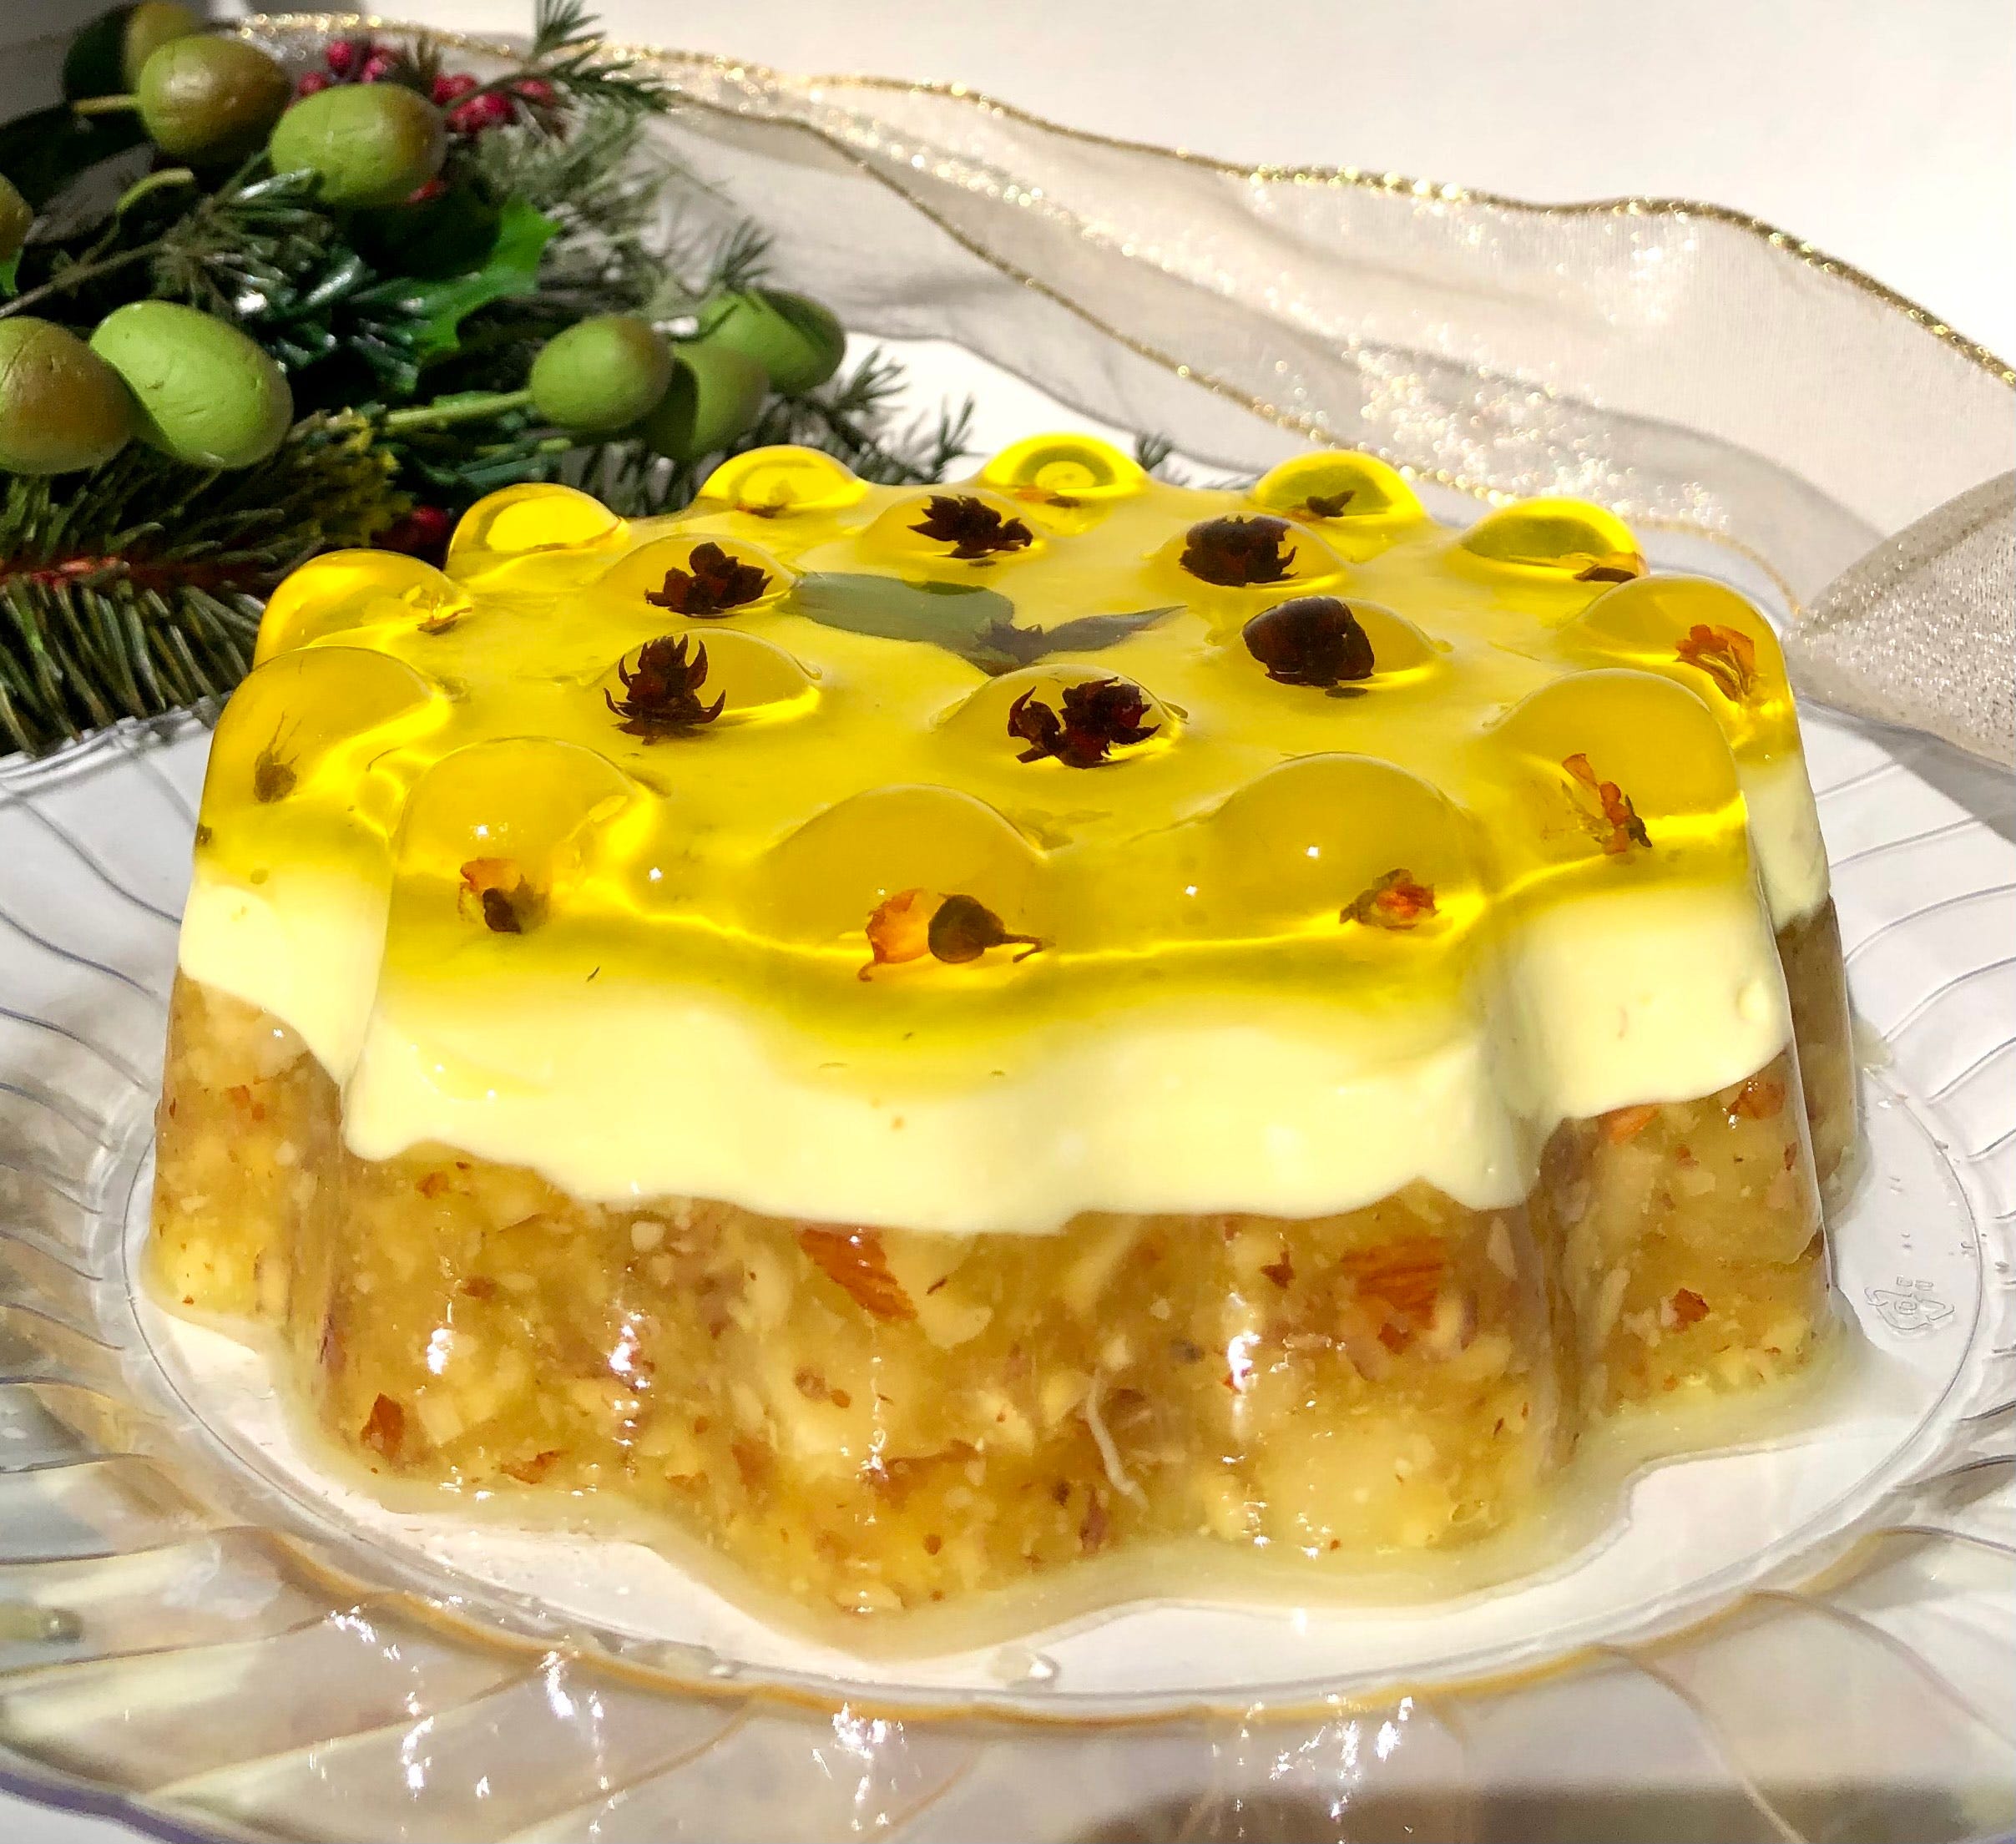
It actually tasted pretty good, if you like Jell-O, and almost as important, it held together. This is trickier than it might sound, so I’ve been practicing for this year, and I’ve got a few tips if you want to try this out yourself, for Christmas or maybe a birthday party for someone you hate.
If it’s your first time out, I suggest using a tested recipe rather than trying to go it alone due to the aforementioned pitfalls. There are about a million to choose from, so it takes some filtering. First, choose your flavors. Do you want savory? Sweet? Modern sophistication or retro shock? Use a recipe with unflavored gelatin and contemporary add-ins (no canned meat!) for the former, and a fruit-flavored gelatin recipe of authentically retro provenance for the latter. (That Spaghetti-O Frankfurter mold that goes around from time to time? It’s not a real vintage recipe — just inspired by.) I think a savory note works really well even if you’re going for sweet; there are some with salty pretzels, cream cheese, pickle relish, and coffee that work really well…as long as you don’t use all of them at once.
Now, think about appearance. Unflavored will take on the color of the liquid you use, so it may be clear, or translucent, or opaque, depending. If you want to use an opaque matrix but have visible decorations, coat your “bits” with clear gelatin you’ve set aside, and place them to chill before adding the base.
Once you’ve chosen a recipe with these considerations, I have a few tips for success. Use a mold designed for gelatin; some of the highly detailed silicone ones for cookies or chocolates will end in tears. Oil it lightly, wiping most of it out before filling, for ease of removal. Next, keep in mind that the standard ratio (3 oz. of Jell-O or 1 envelope of unflavored Knox to 2 cups of liquid) is too delicate for most molds, especially if they need to hold height. I typically adjust the ratios so that I am using only about 1 ½ to 1 3/4 cups. In addition, additives like acids, alcohol, and raw fruit can interfere with gelling, so start with a tested recipe to build experience especially if you want to use one of those. Stir longer than you think you need to in order to make sure it’s fully dissolved.
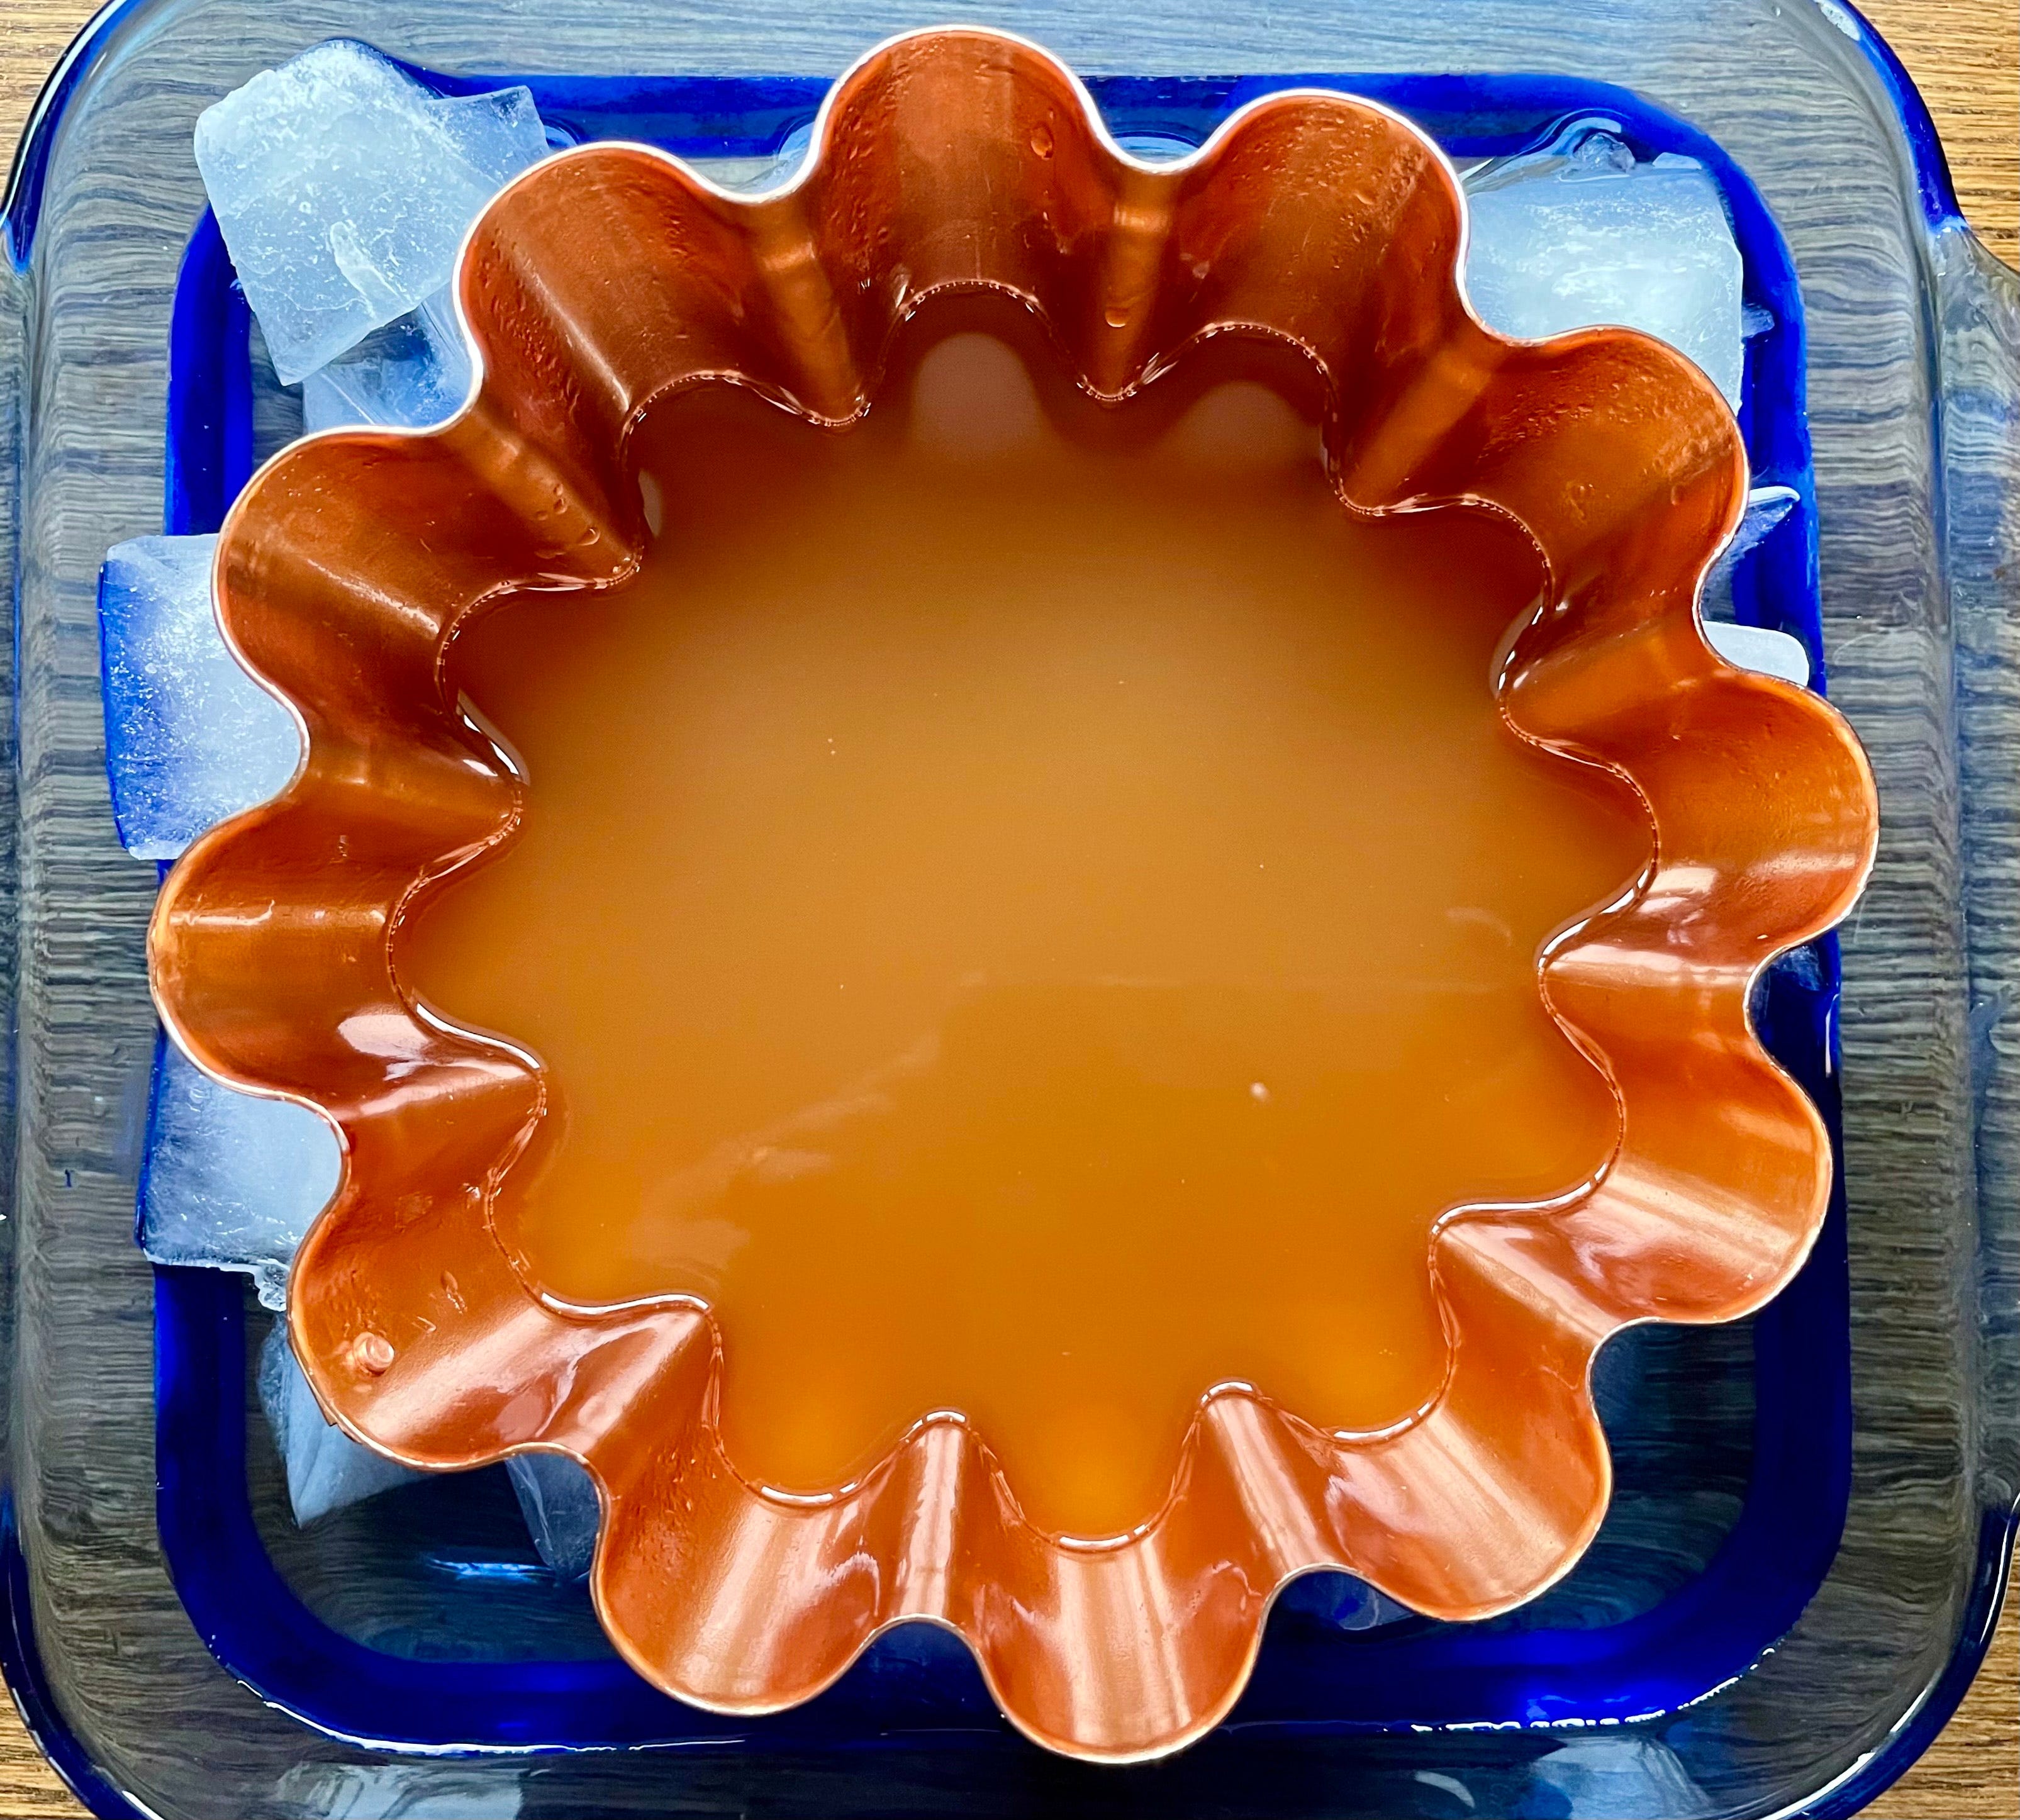
One of the trickiest aspects is chilling time. If layering, you must chill to set but not yet firm; too soft and it will intermix, but too stiff and the layers may separate as you unmold or slice. I ran into a problem with my test batch of this chamoy mango, coconut, and Thai green curry-lime slaw mold of my own invention (and maaaaybe my entry for this year’s Invitational) — I added the middle layer before the top one was set enough in the middle, and I got a little coconut milk incursion.


If I’m not sure the ratios I have going will work, I sometimes put a teaspoon on a plate in the freezer for a few minutes to see how firm it gets once chilled. If it’s rubbery, I can add more liquid to the main batch, and if it doesn’t set, I can melt up some more unflavored and add that. I also often use ice baths so that I can monitor closely for just the right moment, and then spoon the next layer on very carefully. A clear first layer with a cream-based layer in the middle will highlight any embedded designs on top, and hide some of the delicious and texture-modifying but ugly mix-ins, like chopped nuts. Once assembled, don’t rush the final chill. Although it may appear set after just a couple of hours, try to give it at least overnight before you dip the mold in warm water for a few seconds, cross your fingers, and turn it out.
As a couple of examples for the upcoming holidays, you could make my Jalapeno Cranberry Mold from my own Christmas cooking plans last year (recipe here) if you want something with at least a modicum of class. It’s nuts with a little cream cheese and jalapeno, and raw cranberries (just like my last post, hahaha.)


Or, you could go with Hellmann’s retro “crandles” recipe, featured in this TODAY piece. I was giggling so hard at them sizzling that I could barely take this photo. It’s Jell-O, cranberries and other fruits, and mayo, and yes, you actually light them on fire. There are tips for getting them to work in that article.
I’ve got a write-up about Susie Hamilton’s 5th Annual Aspic Invitational coming out in Texas Monthly in a day or two, so I’ll update with that link when it’s out! It’s well worth reading the details…especially the history of her neighborhood, and a partial list of other entries.
Happy jiggling!
Zen and the Science of Candy Corn is a reader-supported publication that brings me great joy. You can literally give me your 2 cents with the tip jar button below!
Thanks so much for reading! But if you decided to subscribe, free or paid? I’d relish that.
And please feel free to share this post with any inherently unpalatable raw cranberry-loving psychopaths you know.